Supplies
Template 568 from DonnasDesignz: donnascutedesignz.blogspot.com
My wordart, right click and save
Mask of choice
Scrapkit of Choice, I used: Whisprd Dreamz Under the Scorpio Spel
Font of Choice, I used: Designer Signature
Lets begin, oh yes program I used is psp v9
500 x 500
1. copy template and paste onto your blank work space.
Some people use Shift D and then use canvas resize to get to the
area we are working with. I prefer to take it over layer by layer so
I can put it together how I want, just in case I want to tweak the
location a bit and what parts I want to use - really it is your preference.
2. When working with templates, the first thing I like to do is get all of
my backgrounds/papers in orders. To do this, select papers of choice,
click inside each of the dark elements of the template, modify, contract
by 2, layer new raster layer, paste into layer.. Play with your papers
and how your tube will eventually sit on them. At this point do NOT
do anything else with the papers. On the round layer, add an extra
paper, one light and one dark, with the light on top.
We will revisit the papers in the next step..
3. With my papers, espeically with this type of template where the
white from the original template is needed, I like to use blur instead
of shadows. To do this, click on each of your papers, one at a time and
duplicte. On the original, adjust, blur, gausion blur 4, ok, merge all 3
layers (both your paprs and the template layer). Do this for all but
the dark circle.
If you remember, I had you paste 2 papers into the circle of the
template layer for the circle, 1 dark and 1 light. Bring the light
layer to the top and add the following settings under effects.
Effects---xero---Fritillary---use the settings below
Granularity - 10
Aggression - 40
Tesselation - 60
Variation - 115
okay
Change blend mode to hard light.
Merge the two paper layers, duplicate, adjust, blur, gausion blur 4, ok
Merge the two duplicated layers and the template layer.
4. My tube and the scrap I chose are darker in nature so I chose to
change the whate dots to a dark grey. To do this to go
Adjust, Color Balance then Manual Color Correction
I then duplicated them and gave them a gaussion blur of 2.
5. Add elements to your tag keeping in mind we still need to add
the word art. Also do not forget to add drop shadow of choice.
I typically use Eye Candy 5 Perspective Shadow with the settings below
Drop Shadow - checked
Center Offset Direction - 45
Center Offset Distance (pixels) - 1.41
Overall Opacity - 52
Overall Blur - 10.75
Faded - perspective blur - 40.60
Faded - fade out - 48
Shade Color - black
Mask Selection - checked
6. If you are satisfied to here, merge visible.
7. Layer, new raster layer, paste a paper or fill with color of choice
add mask of choice.
8. At this point, resize your tag to desired size. I like mine smaller, so
generally resize to 500*500 or thereabouts.
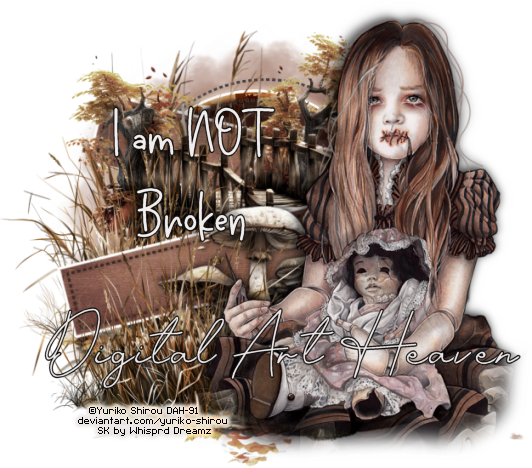
9. Add your word art, adjust blend mode to your liking.
10. Add correct copyright - make sure this is done AFTER sizing.
Save your tag. Thank you for trying my tutorial

0 comments:
Post a Comment